Business Website Post Disclosure: Bear in mind that some of the links in this post are affiliate links and if you go through them to make a purchase I will earn a small commission at no extra cost to you. Keep in mind that I link these companies because of their quality and not because of the commission I receive from your purchases. The decision is yours, and whether or not you decide to buy something is completely up to you.
A Business Website Setup Step-By-Step Guide: From Domain Name Search To Theme Install
Business Website DIY Approach in 4 Easy Steps!
So, you want a decent looking website? Something that will make your business look great but won’t break the bank is what you are thinking, right? Well, I am here to tell you it is indeed possible to achieve this. I want to also point out it will require a willingness to learn, about 20-30 hours of your time, and a credit card to cover the minimal costs. All of that combined with this blog article can get you up and running on your very own business website for less than $300 USD!
Below, in a fairly generalized approach, I make my best attempt to help you get started with a business website. We will cover the basics and help you get established online. You will need to have some basic skills in order to be successful. These skills would include how to use your computer and manage files on it (documents and image files) as well as accessing the internet via a web browser such as Chrome, Firefox, Safari or even Explorer/Edge.
If you feel that you need additional guidance you can sign up for a Bizolver website design training course. In the course, you will be guided through every step of your website design and all the way to the launch.
STEP 1: Domain Name Search
If you haven’t already done so, you need to research and choose a domain name to serve as your business website address. It is recommended that you try to choose a TLD (top-level domain). A TLD would be a .com for the commercial sector and a .org for the non-profits and others. I also recommended that you secure the domain name extension of your country such as .ca or .us.
It’s a good idea to choose a domain name that represents your business and is short in length. If you can find a domain name that is 7-9 characters or less this would be ideal. Found one that contains your business name? Perfect, then that will likely be your best choice. Shorter domain names are easy to remember and fit well on print mediums like business cards, billboards, and vehicle wraps.
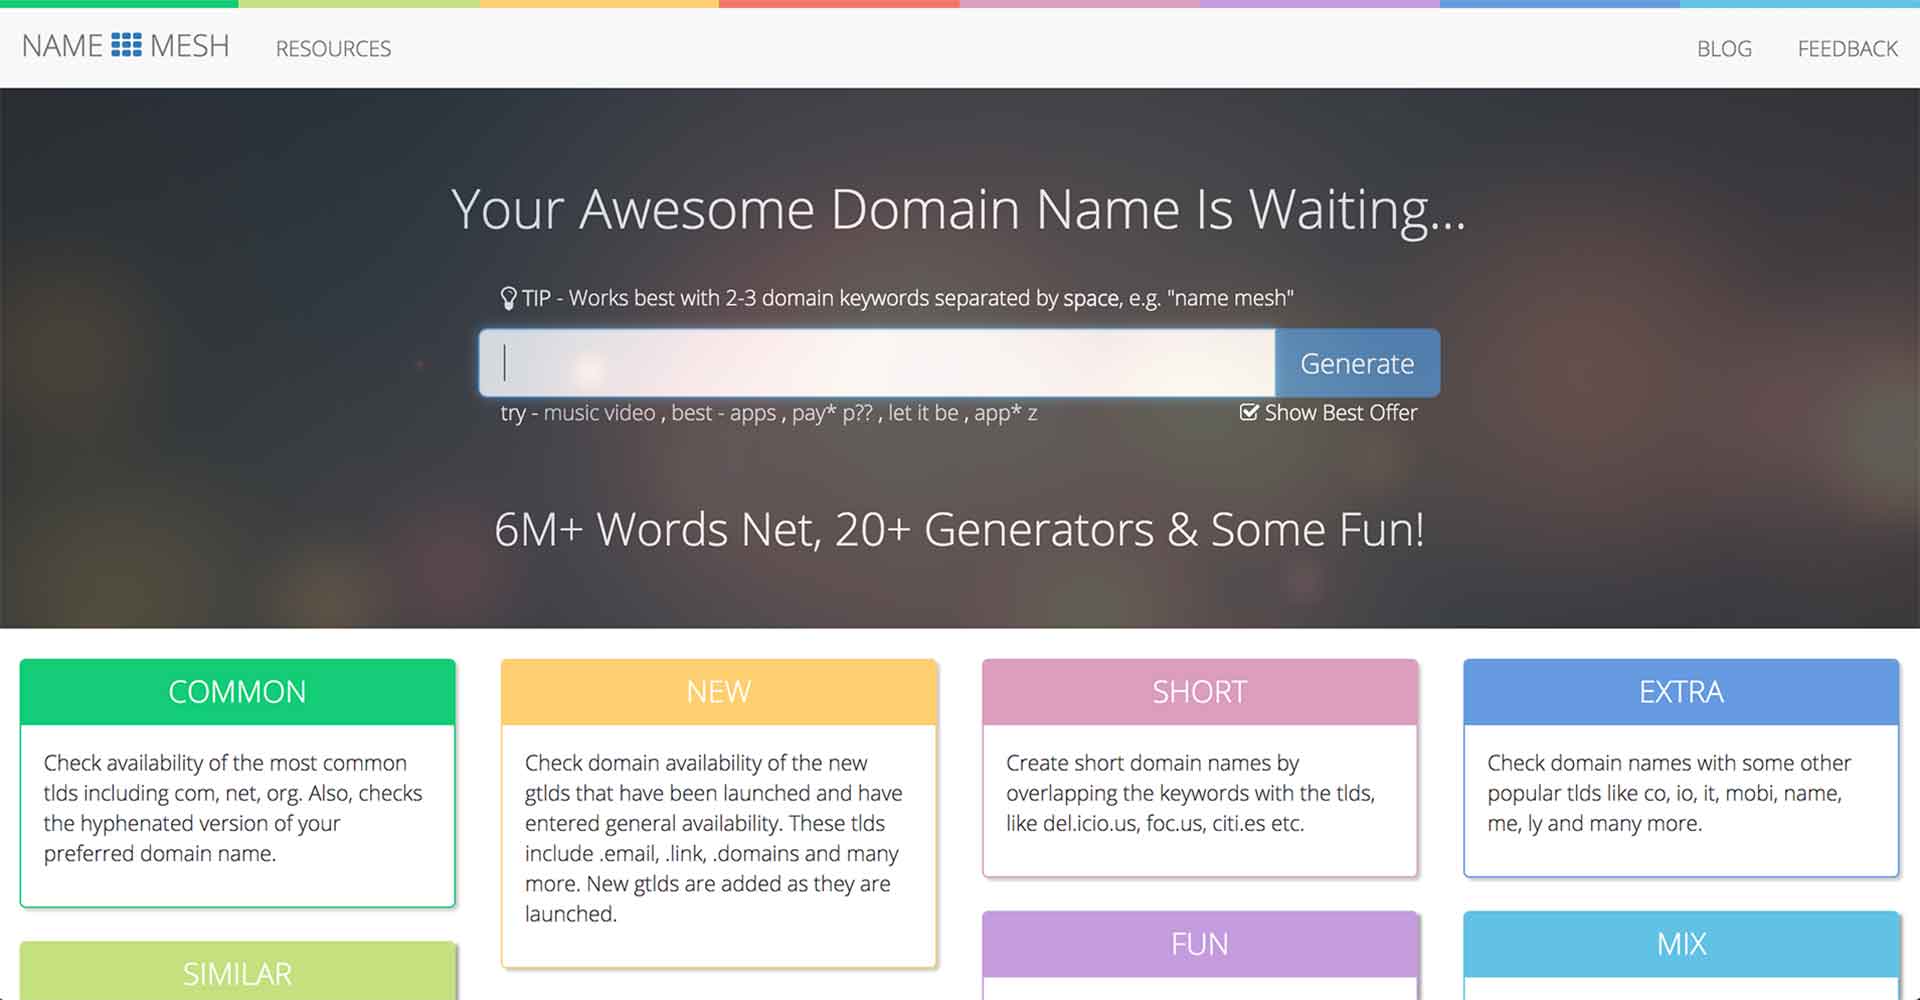
Find Your Domain Name
To perform a domain name search I recommend using the Namemesh.com website. It is a domain name search engine that also generates a lot of alternative domain names in the event your desired one is already taken. On that note, be prepared to find that your desired domain name will be unavailable so you may need to get creative. One way of getting creative is by simply using your business name initials. Another way is by adding LTD or INC to the end of the name, if appropriate. Once you have found a domain name that is available, proceed to the next step where you will secure it.
STEP 2: Purchase Web Hosting And Register Your Chosen Domain Name
Now that you have found the perfect domain name to represent your business website you will need to secure and register it. This can be done via most reputable web hosting companies, Bluehost. Bizolver is affiliated with Bluehost, who is one of the highest rated hosting services companies. They are also recommended by WordPress. To register your domain name simply click this link to visit Bluehost (affiliate link) and click the green button that says “Get Started”. This will bring you to a screen where you will first select a hosting plan for your website. I recommend starting with the “Basic” package.
Once you have selected your preferred hosting package you will proceed to the next screen that allows you to search for your chosen domain name from the previous step. Enter your domain name in the “Create a new domain” field and click next. Make sure you have chosen the correct domain name extension from the drop down box before clicking next.
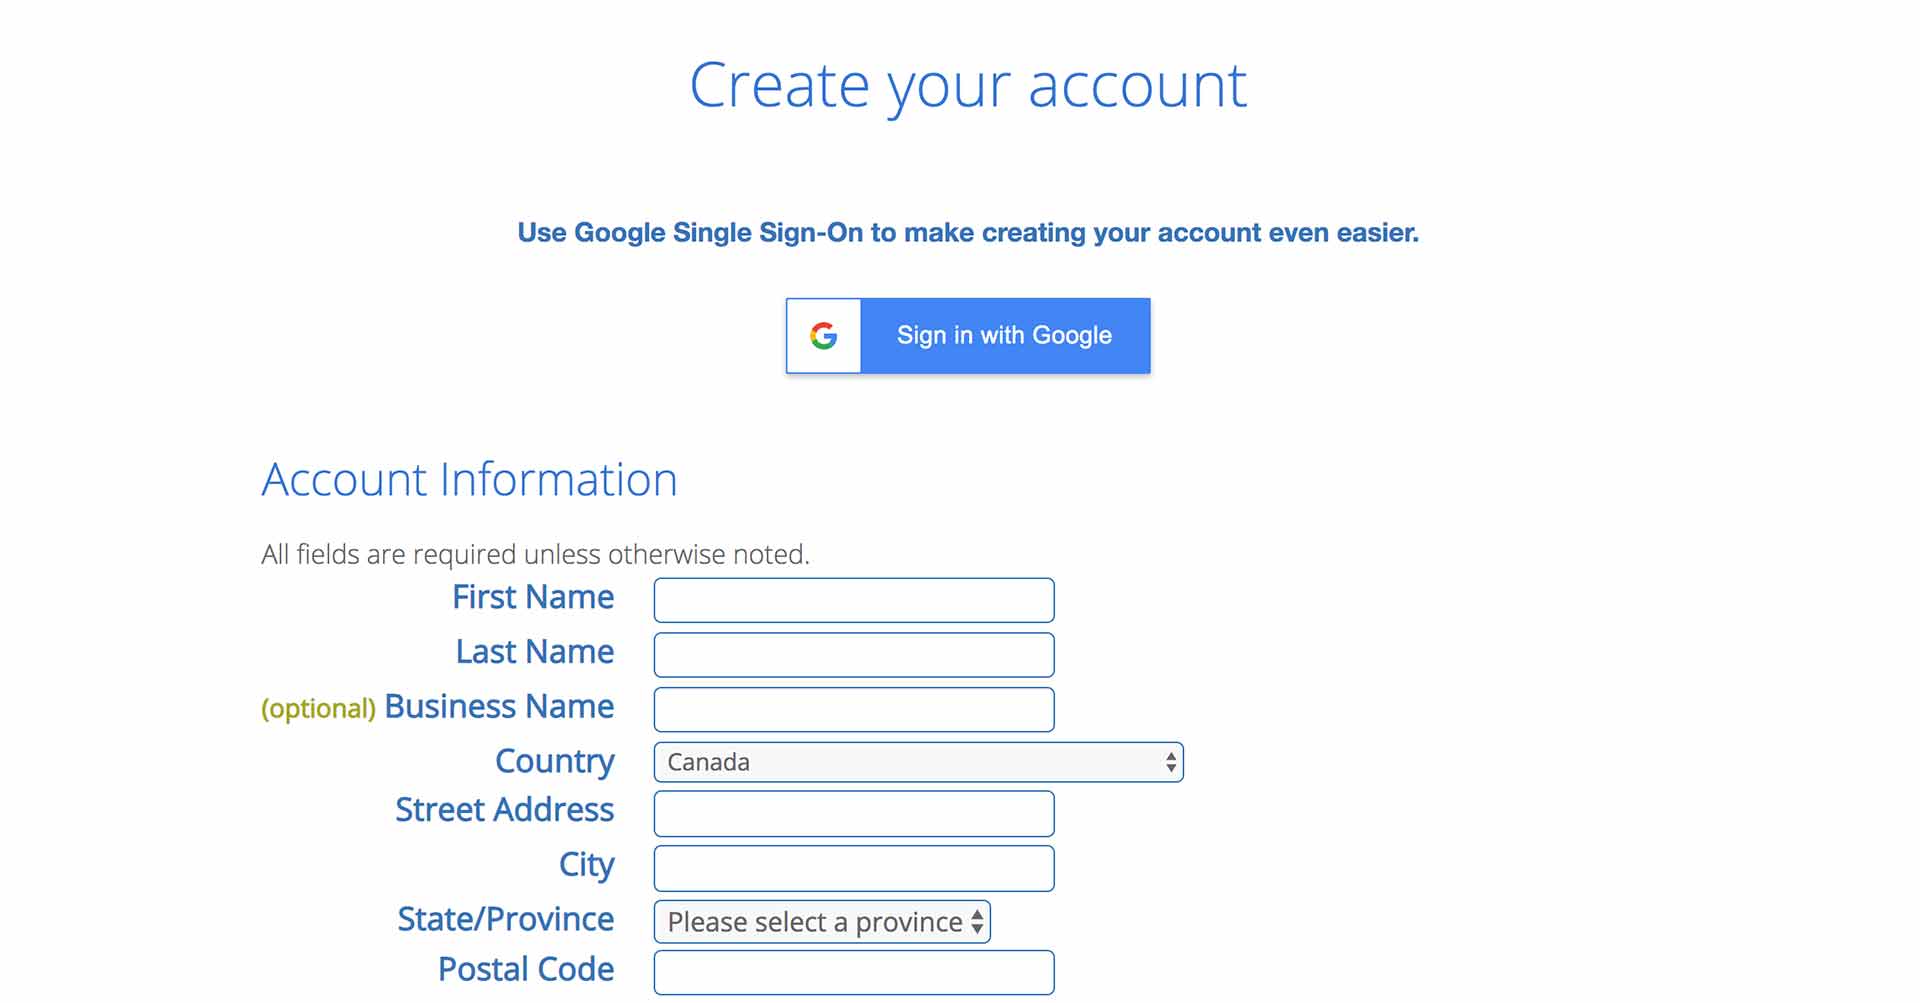
Business Website Hosting Account Creation
The next screen is the registration screen and will feature a form that you will need to complete with the appropriate information. You will notice near the bottom of the form there is a section called “Package Information”. You will notice that your 36 month plan has been preselected. I would recommend purchasing the 36 month plan for bulk savings. If you change it to a lesser term (12 or 24 months) the pricing value decreases but remains very budget friendly. I also recommend keeping the domain privacy option selected. In my opinion, the other options are really not necessary and you can decide whether or not they are worth your while.
STEP 3: Launch WordPress Installation
Now that you have acquired a hosting package and secured your domain name it’s time to get WordPress installed. This is actually quite simple to acheive because Bluehost pretty much walks you through the steps and automagically installs WordPress for you. You will need to go to the “My Sites” tab in your Bluehost account. Once you are on this page you will see a blue button to the right of the screen that says “Create Site”. Go ahead and click it and Bluehost will install and bring you to your WordPress dashboard. Et Voila! You now have WordPress installed via your Bluehost account. Leave the WordPress site for your domain name window open. All you have to do now is grab yourself a licensed copy of Divi and install it as detailed in the next step.
STEP 4: Acquire, Install And Activate Divi Theme
Now you need to acquire, install and activate the premium WordPress theme called Divi. This theme is created by Elegant Themes and is available as part of their membership plans. To get your copy you can click the following affiliate link and purchase an Elegant Themes membership (affiliate link). There are two options to choose from: yearly or lifetime. I suggest lifetime if you plan on owning a website for longer than 3 years. This can also be used for multiple website projects you might want to launch in the future.
Once you have secured your account you will need to download a copy of the Divi theme to your computer. Once logged into the Members Area you simply scroll down to the Divi theme section and click the big purple button that says, “Download The Divi Theme”. This will download a zip file copy of the theme to your computer called Divi.zip. Do not unzip the file. Take note of it’s location on your computer and remember this for the theme installation step which is next.
Install Divi Theme On Your WordPress Website
So now that you have your very own liscenced copy of Divi downloaded you will need to return to your WordPress website window. If for some reason your session has expired you will need to login again. You can always access your website directly from your Bluehost account dashboard from the My Sites tab. Or, you can type your website domain name into the address bar of your browser with /login added after your .com (yourwebsite.com/login) and then hit enter on your keyboard. This should take you to your login page where you will need to add your username and password.
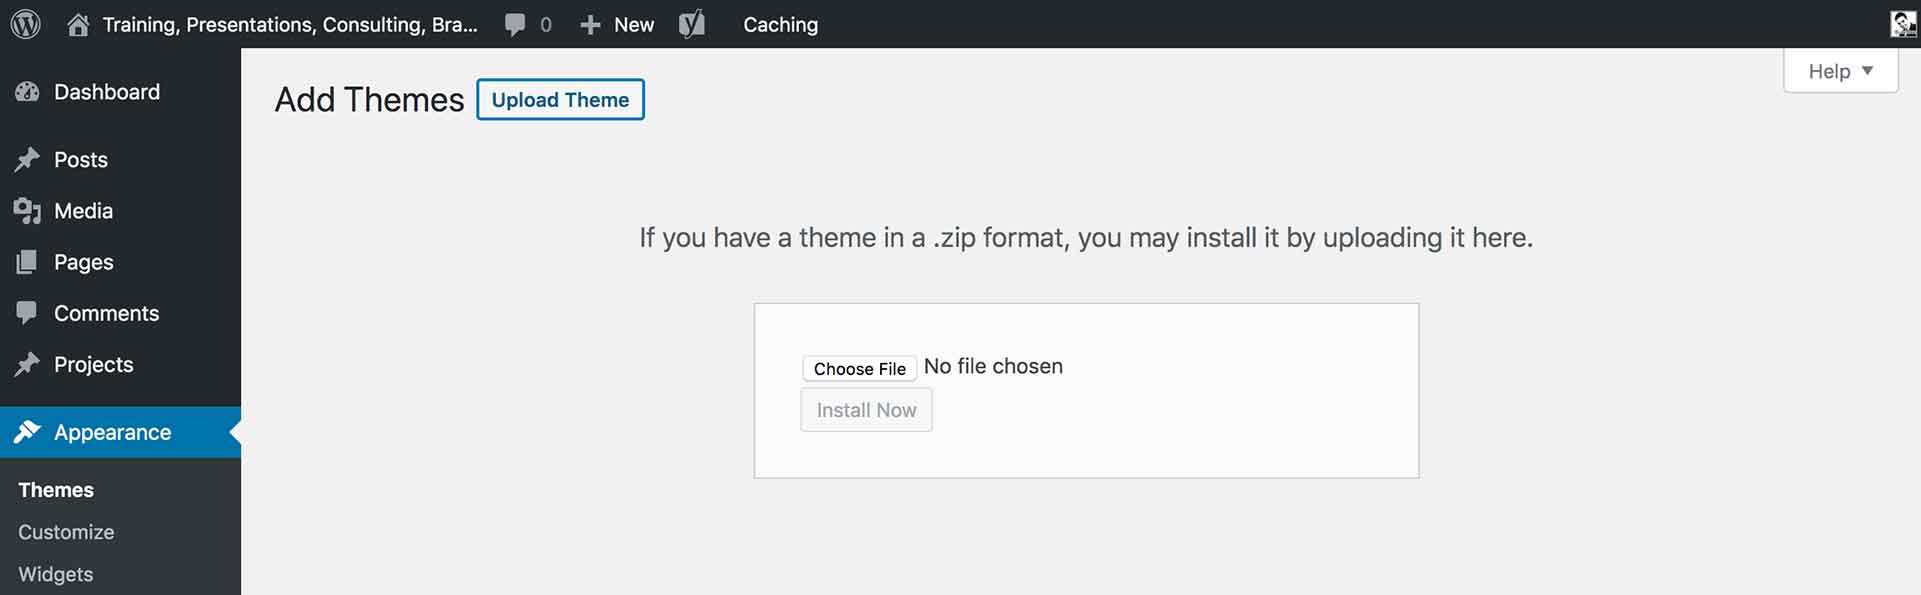
Once you are logged into your WordPress you will go to the Appearance tab and click on Themes option to install Divi. This will bring you to a Themes screen where you will see the default freebie themes from WordPress. At the top of the screen you will click the Add New button and on the next screen the Upload Theme button. From here a section will appear that prompts you to select the theme file you just downloaded to your computer. Click the Choose File button and select the file called Divi.zip. Click the Open button once it is selected. The file will be uploaded into your WordPress install. You will then be prompted to activate the theme. Go ahead and activate the theme. Now you should have a fresh copy of Divi installed.
Validate Your Copy Of Divi
The next thing you need to do is to validate your copy of the Divi theme. This is done by revisiting your Elegant Themes account. Go to the Members Area and click the My Account tab. Scroll down until you see your username and your API key. You may need to generate a new key by clicking the pink Generate New API Key button. Copy your API key and take note of your username.
Return to WordPress and navigate to the Divi tab near the bottom of the black menu on the left side of the screen. Click the Divi tab and a new screen will load. Within the purple Divi Themes Options Menu along the top of the page you will find some tab options. Click on the Updates tab. You will see you can now enter your username and API Key from your Divi account. Enter the details and then click the green Save Changes button at the bottom of the screen. Wait for the green checkmark to appear on the screen to confirm the changes were saved.
You have now validated your copy of Divi and can keep up with all of the updates. This also allows you to get technical support directly from Elegant Themes if you ever need it.
Basic Business Website Setup Complete!
Congratulations! You have now achieved the completion of most of the more technical aspects of getting your website established. You have secured your domain name and website hosting for at least 1 year. You have achieved the install of WordPress and installed a fresh copy of the Divi theme. You have likely saved your business a large investment it couldn’t really afford yet. That’s the good news.
But wait, there’s more! Now that you have your website infrastructure all setup you need to get started with building it out. This means you will need to select a theme from the Divi layouts library that suits your business and clients best. Luckily for you, Divi has over 100 different predesigned layouts for you to choose from. I will be creating a new post soon that goes through these layout options and offers my insights. Coming soon!
Thanks And Feedback
Thanks for taking the time to read this article. It is my intent to help you save money and still get quality tools for your business. I have started a few businesses and worked with a lot of startups over the years. One thing that I have noticed is the up front expense of a quality website can be hard to swallow. This article, and others I will post, are intended to get you up and running with a basic website. By using the tools I have recommended I and the majority of others can help you take your website to new heights when you are ready. Or, you can take my digital marketing training course and I will show you how to manage and market your whole digital marketing strategy!
Leave Your Feedback Or Ask Questions About This Post
Do you have any questions, comments, or feedback about the contents of this post? Feel free to leave a comment below or send an email via the contact form. I try to reply ASAP but can take 1-3 business days when I’m busy, which is often the case.
Start learning how to better manage your Own digital marketing strategy in-house!
You also need confidence that the training provider is not only qualified to train businesses but also has real-world experience. It's important for us to have a phone call or in-person meeting to dive into the details a bit more. The first step is reaching out to us by using the contact form below.
Training Contact
Bizolver is based out of Moncton, New Brunswick.
Clients can take advantage of remote training via internet and telephone for certain topics.